When a quarter of beef hangs in the cold room, the fat tells us as much about the animal as the grain of the muscle does. Rendering tallow is an ancient, steady chore of the farmstead kitchen, turning raw scraps that would otherwise spoil into a stable cooking fat. Good beef tallow is hard, pale as parchment, and carries a clean, mild aroma that speaks of pasture rather than grease. When we take the time to melt it down cleanly, it serves us for months in the skillet, on the baking board, and over the roasting hearth.
The process demands little in the way of specialized machinery, but it calls for patience and careful observation. We rely on our eyes, our ears, and our hands to judge the state of the kettle. If we rush the heat, the fat scorches and acquires an acrid, brown taste that cannot be undone. If we pull it from the heat too soon, water remains trapped inside, inviting mold during storage. Here is how we break down raw beef trimmings and guide them through a gentle, clean wet render on the kitchen bench.
Selecting firm kidney suet over soft muscle trimmings
Not all beef fat behaves the same way over heat. We divide our trimmings into two broad classes: visceral fat, which sits around the kidneys and lumbar cavity, and subcutaneous or intermuscular fat, which clings to the brisket, ribs, and outer hide. For pure, snow-white kitchen tallow with a neutral character and a firm snap at room temperature, we always look for suet. Suet is the dense, crumbly fat that encases the kidneys, known among butchers as the leaf fat or caul fat.
Kidney suet contains a higher concentration of saturated stearic and palmitic acids than surface trimmings. This chemical makeup gives it a melting point between 45 and 50 degrees Celsius, allowing it to solidify into a hard, crystalline block that resists rancidity. Soft trimmings from the flank or chuck melt at lower temperatures, around 35 to 40 degrees Celsius, because they carry more monounsaturated oleic acid. While you can render muscle trimmings for rustic frying fat, the resulting tallow will be softer, slightly yellow, and distinctly beefy in flavor.
| Fat Characteristic | Kidney Suet | Subcutaneous Muscle Trim |
|---|---|---|
| Texture at 18 deg C | Dry, brittle, breaks into chalky flakes | Soft, pliable, smears under thumb pressure |
| Melting Point | 45 to 50 degrees Celsius | 35 to 40 degrees Celsius |
| Free Fatty Acid Content | Very low; minimal connective tissue | Moderate; mixed with muscle fibers |
| Finished Odor | Faint, sweet, neutral pasture aroma | Pronounced savory, roast-beef smell |
| Best Culinary Use | Flaky pie crusts, high-heat searing, deep frying | Basting steaks, roasting root crops, savory gravies |
When you source fat from a local butcher or your own livestock harvest, ask for dry, fresh kidney suet that has been thoroughly chilled. Inspect the pieces before beginning. We look for bright white or pale cream tissue that feels firm to the touch. Reject any fat that carries a dull gray hue, an ammonia odor, or excessive blood clots. If small traces of red meat adhere to the edges, we trim them away cleanly with a stiff boning knife, as stray protein left behind will brown quickly and taint the clarity of the oil.
Chilling fat hard before running it through a coarse plate
The cell walls that trap beef lipid molecules are tough networks of collagen and connective tissue. To release the fat evenly, we must expose as much surface area as possible. Chopping fat into hand-cut cubes with a chef knife takes hours and leaves irregular chunks that melt at uneven rates. Running the raw fat through a manual or electric meat grinder yields an ideal, uniform mash, but warm fat will instantly smear, clog the cutting knife, and turn into a paste that heats up before it ever hits the kettle.
To avoid this, we chill the trimmed suet until it is nearly rigid. Cut the suet into strips roughly two centimeters wide, spread them in a single layer on sheet pans lined with parchment paper, and place them in the freezer for 40 to 50 minutes. You want the fat firm enough that it resists squeezing between your fingers, but not frozen solid like an ice cube. At the same time, place the metal grinder head, the feed auger, the cutting knife, and a coarse grinding plate into the freezer so the whole metal assembly stays cold during work.
- Plate selection: We fit the grinder with an eight-millimeter or ten-millimeter coarse plate. A fine four-millimeter plate shears the tissue too aggressively, creating an emulsion of water and cellular debris that makes clearing the tallow much harder later on.
- Feed rate: Drop the chilled fat strips into the hopper at a measured, continuous pace. Never force the plunger down with heavy pressure; let the screw draw the pieces into the revolving knife naturally.
- Cleaning the throat: If you notice the fat smearing against the plate face into a greasy film rather than dropping out as distinct ribbons, stop immediately. Clear the knife of wrapped sinew, return the fat strips to the freezer for ten minutes, and resume once the metal and tissue are cold again.
If you do not own a meat grinder, use a heavy, razor-sharp cleaver on a cold wooden chopping board. Work in small batches of 300 grams, keeping the remainder in the refrigerator. Dice the fat by hand into pieces no larger than six millimeters on any side. The finer and more uniform your pieces, the quicker the lipid pool will form, sparing the fat from prolonged heat exposure.
The wet rendering method: water as a thermal buffer
We render our beef tallow using the wet method, which introduces a small quantity of clean water into the kettle at the start of the cook. A dry render puts cold, ground fat directly against bare metal over an open flame or burner. While dry rendering can be done, it carries a high risk of scorching the delicate collagen proteins on the bottom of the vessel before enough free oil has melted out to form a protective bath. Scorched proteins release bitter compounds that permanently discolor and flavor the batch.
Water acts as a natural governor on the pot. Because liquid water cannot rise above 100 degrees Celsius at sea level, it keeps the bottom of the pot safely below the scorching threshold during the early minutes of melting. The ground fat warms gently in the simmering water, releasing its liquid lipids into the broth. The liquefied tallow floats to the top, while the water and water-soluble proteins gather underneath.
For a batch of two kilograms of ground suet, pour roughly 200 to 250 milliliters of pure water into a heavy-bottomed, enameled cast iron Dutch oven or a stainless steel stockpot. You do not need to submerge the fat; you only need a thin pool across the base of the pan to distribute the heat evenly. Turn the burner to medium-low, cover the pot with a tight lid for the first 20 minutes to trap rising steam, and let the mass soften. Once a steady pool of melted oil covers the bottom, take the lid off entirely so the water can begin to evaporate freely into the kitchen air.
Listening to the kettle: knowing when water has boiled off
Once the lid is off, rendering becomes a craft of listening and watching. As long as moisture remains in the pot, the temperature of the mixture cannot rise far above 100 degrees Celsius. However, if any water remains emulsified in the final jarred tallow, it will create micro-environments where bacteria and molds can establish themselves. We must boil off every drop of water without overheating the remaining fat.
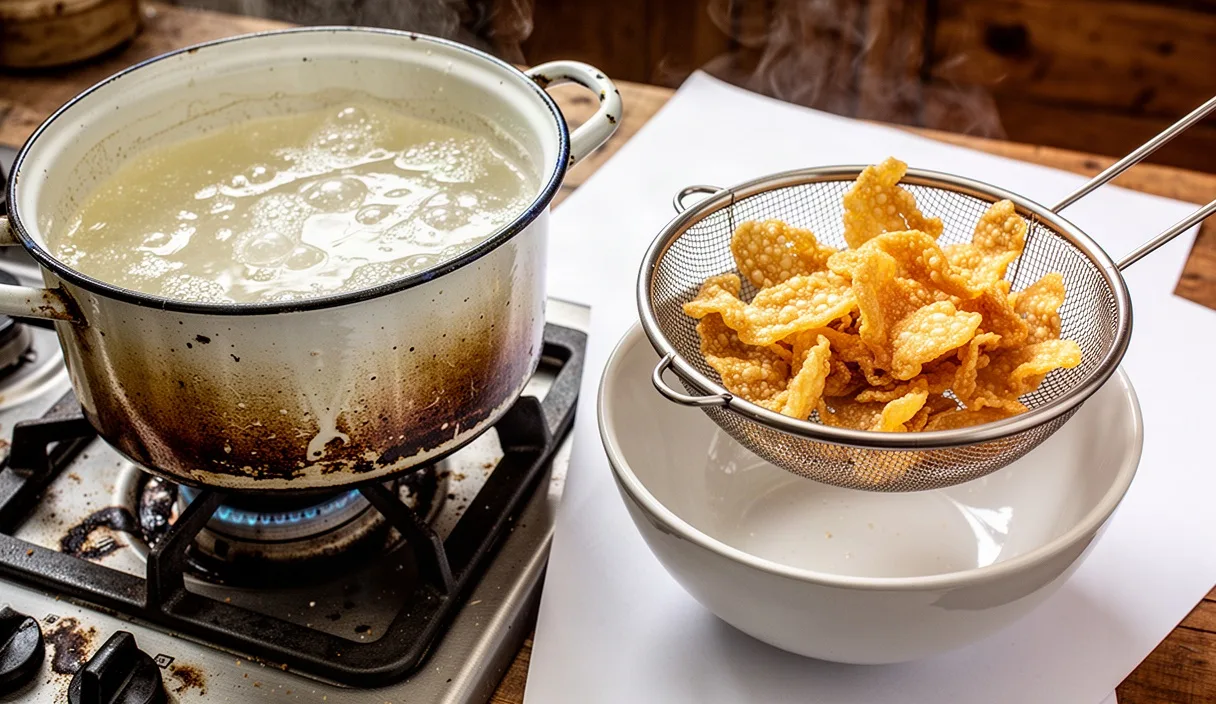
During the first hour, the pot will hiss, sputter, and bubble vigorously. The steam rising from the surface carries a cloudy, white vapor. The bubbles are large, irregular, and watery, bursting with a wet, popping sound as moisture boils out from beneath the lipid layer. Keep the flame low and stir every fifteen minutes with a flat-edged wooden spatula, scraping the bottom of the pot to prevent dense bits of connective tissue from settling and adhering to the metal.
As the render approaches its final phase, usually after two to three hours depending on your batch size, the character of the kettle shifts completely:
- Sound transition: The loud sputtering quiets down to a faint, steady crackle. It sounds like crisp dry leaves rustling underfoot rather than boiling water. Eventually, the pot falls nearly silent.
- Bubble morphology: The large, wet bubbles vanish. In their place, a fine, golden froth of tiny bubbles rises to the top, resembling the foam on a freshly pulled ale. This indicates that only pure fat is surrounding the cracklings.
- Tissue appearance: The bits of connective tissue, known as cracklings, shrivel, turn golden brown, and float buoyantly on the surface of the amber-colored oil.
- Surface clarity: The steam ceases to billow. If you look straight down into the pot, the liquid oil between the cracklings is transparent, like warm honey.
If you use a digital probe thermometer, the liquid will hold steady near 100 degrees Celsius for most of the cook. Once the water is gone, the temperature will begin climbing past 105 degrees Celsius toward 115 degrees Celsius. Do not let the kettle exceed 120 degrees Celsius. As soon as the bubbling settles and the thermometer reads 110 degrees Celsius, remove the pot from the burner immediately.
Straining cracklings through doubled muslin cloth
Suspended in the hot, liquid fat are millions of tiny protein particles alongside the shrunken cracklings. If left in the oil, these microscopic bits will brown, settle into a dark sediment at the bottom of the storage jar, and hasten oxidation. We strain the fat while it is hot and free-flowing, taking care to handle the molten oil with steady hands and clear work surfaces.
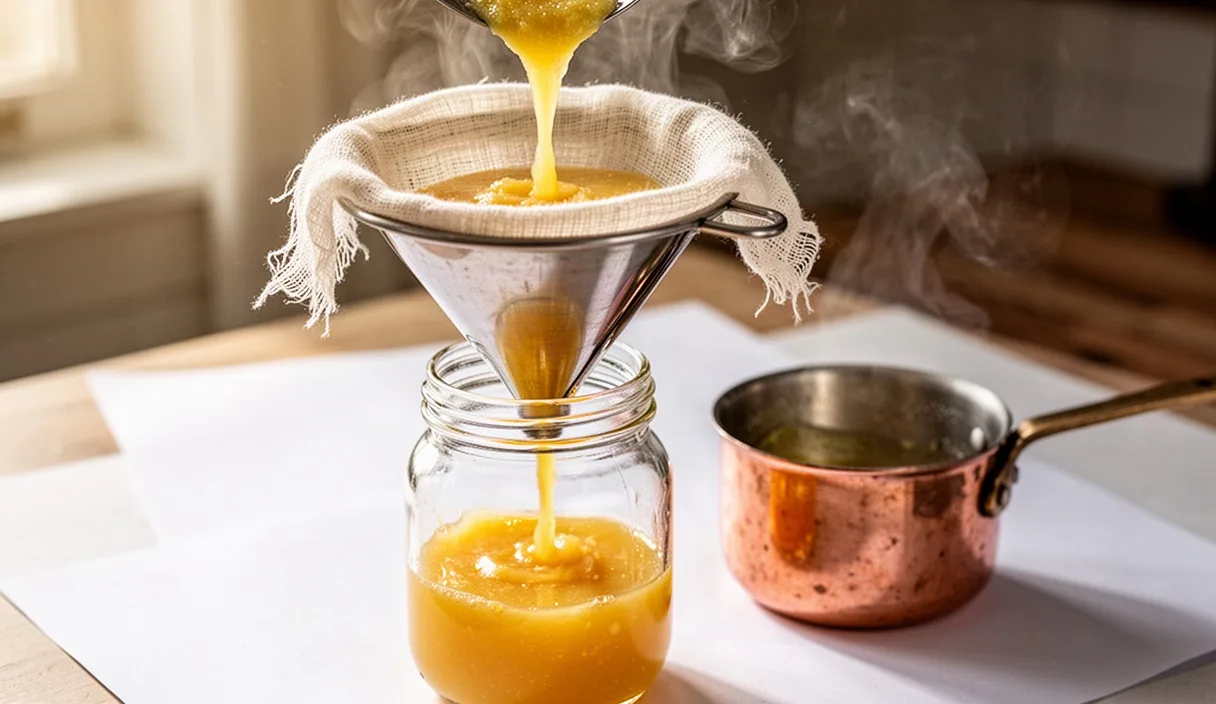
Set a stainless steel colander or large conical strainer over a clean, heat-resistant metal pot or a four-liter Pyrex batter bowl. Line the interior of the strainer with two layers of clean, unbleached cotton muslin cloth or a fine cheesecloth woven at grade 50 or higher. Rinse the cloth in hot water and wring it out until it is barely damp before placing it in the strainer; this prevents the dry cotton fibers from soaking up and trapping your clean fat, but ensure no standing droplets remain on the fabric.
Ladle the hot tallow slowly through the cloth. Do not pour the entire pot at once, which can dislodge the fabric and cause hot fat to slosh over the rim. The liquid will run through as a clear, golden-yellow stream, leaving the crisp cracklings behind in the bowl of the cloth. Once the bulk of the fat has drained through, allow the cracklings to rest in the sieve for ten minutes under gravity.
Resist the temptation to twist the cloth and wring it out with your hands. Squeezing forces muddy, microscopic protein sludge through the weave of the fabric into your clarified fat. Lift the muslin bundle away gently, scrape the drained cracklings into a separate bowl, and toss them with coarse sea salt. Eaten warm from the pot or scattered over roasted greens, these cracklings provide an earthy, crunchy treat that repays the cook for the afternoon's labor.
Pouring warm fat into wide-mouth jars for the pantry
Tallow expands slightly as it warms and contracts as it hardens. It should be transferred into storage vessels while still fully liquid, but cool enough that it does not risk shattering cold glass. We allow the strained fat in the receiving bowl to cool down to roughly 60 degrees Celsius. At this temperature, the fat is liquid, safe to pour, and warm enough to flow freely without clinging to the sides of your ladle.
Use wide-mouth, straight-sided glass canning jars that have been washed thoroughly in hot, soapy water and dried completely in a low oven at 100 degrees Celsius for fifteen minutes. Ensure the jars are completely dry, as a single drop of stray rinse water will compromise the shelf stability of the fat. The straight-sided, wide-mouth profile makes it easy to scoop out cold, rock-hard tallow with a heavy metal spoon when you are cooking at the stove.
- Fill the jars: Set the warm jars on a folded linen kitchen towel to cushion against thermal shock from the counter. Pour the fat through a stainless steel canning funnel, leaving two centimeters of headspace at the top of each jar.
- Settling: Leave the filled jars undisturbed on the benchtop at room temperature. Do not cap them immediately; capping warm fat traps condensing steam inside the lid, which drips down and ruins the dry seal.
- Cooling: As the fat cools slowly over five to six hours, the amber oil turns opaque, passing through an olive-yellow gel phase before setting into an ivory-white, porcelain-hard block.
- Final seal: Once the jars are cold to the touch throughout the core, screw on clean, dry two-piece metal lids firmly. Store the sealed jars in a dark, cool pantry where the temperature remains between 10 and 18 degrees Celsius.
When properly rendered and protected from heat, air, and light, tallow rendered from suet will easily keep on the pantry shelf for nine to twelve months without spoiling. For longer preservation extending past a year, we tuck the jars into the cold cellar or the freezer, where the fat will keep indefinitely without losing its clean cooking qualities.
Common mistakes to avoid
Rendering fat is forgiving, but a few subtle errors can spoil the keeping quality or flavor of an entire batch. Keep an eye out for these missteps on the bench:
- Using excessive heat early on: Turning the flame high to speed up melting will scorch the proteins against the base of the kettle before the fat has rendered out. Keep the flame low; a gentle simmer yields a pure white tallow, while high heat creates brown, bitter grease.
- Skipping the muscle trim: Leaving red meat on the suet introduces myoglobin and water-soluble proteins that brown rapidly in hot fat. Take the extra five minutes to slice away all streaks of red tissue before grinding.
- Pouring into wet or freezing-cold jars: Hot fat poured into a cold or wet jar risks breaking the glass through thermal shock. Keep your jars warm and bone-dry before the pour.
- Sealing jars before they cool: Trapping warm air inside a sealed jar creates condensation on the underside of the lid. Water droplets falling onto the surface of the fat will cause localized mold colonies to sprout within weeks.
- Using soft belly or seam trimmings for pastry tallow: Soft fat yields tallow that remains semi-liquid or greasy at room temperature. Reserve flank and trim fat for deep frying or bird feed, and reserve kidney suet for kitchen baking and fine pan searing.
Taking the work to the stove
With clean, pure tallow resting in jars on your pantry shelves, your kitchen bench is prepared for serious cooking. This fat possesses a smoke point around 205 degrees Celsius, making it exceptional for searing cast-iron steaks, frying potatoes to a crisp, golden shell, or coating root vegetables for the roasting oven. In the baking realm, chilling your suet tallow hard and cutting it into stone-ground flour alongside cold butter yields pie crusts and savory biscuits with an unmistakable, flaky structure that vegetable shortenings cannot match.
Start your first project with a single jar. Scoop out two tablespoons into a hot skillet, watch it melt clear without sputtering, and use it to fry eggs or roast hand-cut wedges of winter squash. If you plan to make tallow in large quantities for long-term survival stores or commercial kitchen use, consult local agricultural extension resources or a certified food preservation authority to review your facility and storage guidelines. For the home kitchen, attention to clean fat, low heat, and dry jars will give you an ancient, dependable fat ready for the year's work.