When autumn winds strip the garden down to bare stalks and wet mulch, the work shifts from tending growth to arresting decay. Beneath the frosted soil, root crops hold sugars and starch built through long summer days. Parsnips sweeten after the first hard freeze, carrots turn crisp and dense, and beets tighten into heavy globes. Pulling them from the earth is only half the harvest. The true craft lies in slowing their living respiration so they sustain our kitchens through the bitter months of January, February, and March.
We do not seek to freeze, pickle, or cook these roots down immediately. Instead, we put them to sleep. Root cellaring is an active practice of balance, matching the living biology of the plant with simple earthen materials: coarse timber, damp mineral sand, and cold air. When we handle a carrot or rutabaga with the care due to a sleeping organism, we can open a bin in late winter and find flesh that snaps cleanly under a carbon steel blade, carrying the vivid scent of November garden soil into the dead of winter.
Cool storage parameters: temperature and humidity targets
Root vegetables remain alive after harvest. They continue to breathe, consuming microscopic reserves of oxygen and burning their own stored sugars while releasing carbon dioxide and water vapor. To keep them plump and sweet, we must slow this metabolic rate to a near standstill without crossing into freezing territory. If the cellar drops below 32 degrees Fahrenheit, ice crystals form inside the vegetable cells, rupturing the cell walls and turning the flesh into waterlogged mush upon thawing. If the room warms past 40 degrees, the dormant eyes awake, sending out pale, spindly shoots that exhaust the root from within.
Our target temperature band is narrow: 32 to 38 degrees Fahrenheit. In this zone, cellular activity drops to a faint trickle. Alongside temperature, relative humidity dictates the lifespan of the bin. Root vegetables are composed mostly of water, often between 85 and 90 percent by weight. If ambient air is dry, moisture leaves the roots through transpiration, leading to wrinkled skins and leathery cores. We hold our storage space at 90 to 95 percent relative humidity. At this saturation level, the air cannot pull water from the vegetable tissues.
Maintaining this balance requires a location shielded from house heat, such as an unheated basement corner, an insulated root cellar, a bulkhead stairway, or an earth-sheltered porch. A steady, gentle draft prevents pockets of stagnant, warm air from settling over the bins. We keep a pair of calibrated thermometers, one at floor level and one at eye level, to monitor the cold stratification throughout the winter.
| Vegetable | Target Temperature | Target Humidity | Expected Storage Window |
|---|---|---|---|
| Carrots | 32 to 34 F | 95 percent | 4 to 6 months |
| Parsnips | 32 to 34 F | 95 percent | 4 to 6 months |
| Beets | 32 to 36 F | 95 percent | 3 to 5 months |
| Rutabagas & Turnips | 32 to 35 F | 90 to 95 percent | 3 to 5 months |
| Celeriac | 32 to 36 F | 95 percent | 3 to 4 months |
Prepping the crop: why you must leave field dirt in place
The natural instinct after lifting roots from the garden is to wash them clean with a hose and a stiff bristle brush. In the context of winter storage, this is the most destructive error we can make. Water forced against the skin strips away the natural waxy cuticle and drives moisture deep into microscopic surface tears. Furthermore, washing leaves the root soaked, creating a wet microclimate on the skin that invites spore germination from airborne molds.
We choose a clear, dry afternoon to lift our roots, waiting until the garden soil is friable rather than sodden. Using a broadfork or a stout garden fork, we plunge the tines eight inches away from the row, rocking the handle backward to heave the soil bed upward. We never pull the roots by their tops alone; snapping a taproot or ripping the crown opens direct pathways for bacterial rot.
Once lifted, we lay the roots across wooden boards or slatted benches in a covered, well-ventilated shed for two to four hours. This brief airing allows the clods of damp field dirt to dry to a dull, chalky consistency. We then take each root in hand, wearing soft leather or cloth gloves, and gently rub away the excess chunks of dirt. We leave a fine, dusty film of mineral soil clinging to the skin. This natural earth coating buffers the root, shields the delicate periderm from abrasion during packing, and supports a native bacterial biome that helps suppress pathogenic fungi.
Cutting stems without nicking the vegetable crown
Foliage is the natural chimney of a root vegetable. If we store carrots or beets with their leaf stalks attached, the greens continue to draw water up from the core and evaporate it into the surrounding air. Within two weeks, full-topped roots turn limp and rubbery. Removing the greens is mandatory, but the manner of cutting determines whether the crown support or rots.
We work with clean, sharp bypass pruners or an oiled carbon steel utility knife. We avoid tearing or twisting the stems off by hand, which often rips out the top bud plate of the crown. We cut across the stem bundle cleanly, leaving a short stub between 1/4 inch and 1/2 inch in length. This stub provides a sacrificial buffer: as it shrivels in storage, it seals naturally without exposing the fleshy crown beneath.
Under no circumstances should you scalp the root. Cutting flush with the top of the root shoulder removes the growth plate, slicing into the moist inner flesh. That bare wound cannot suberize (heal over) in cold, humid air. Instead, it turns brown, weeps clear fluid, and becomes an entry point for gray mold (*Botrytis cinerea*) and soft rot. We also leave the long, slender taproots intact. Cutting off the bottom tip of a carrot, beet, or parsnip creates an unsealed wound at the base, precisely where moisture settles in a storage crate.
Building sand tiers inside ventilated wooden crates
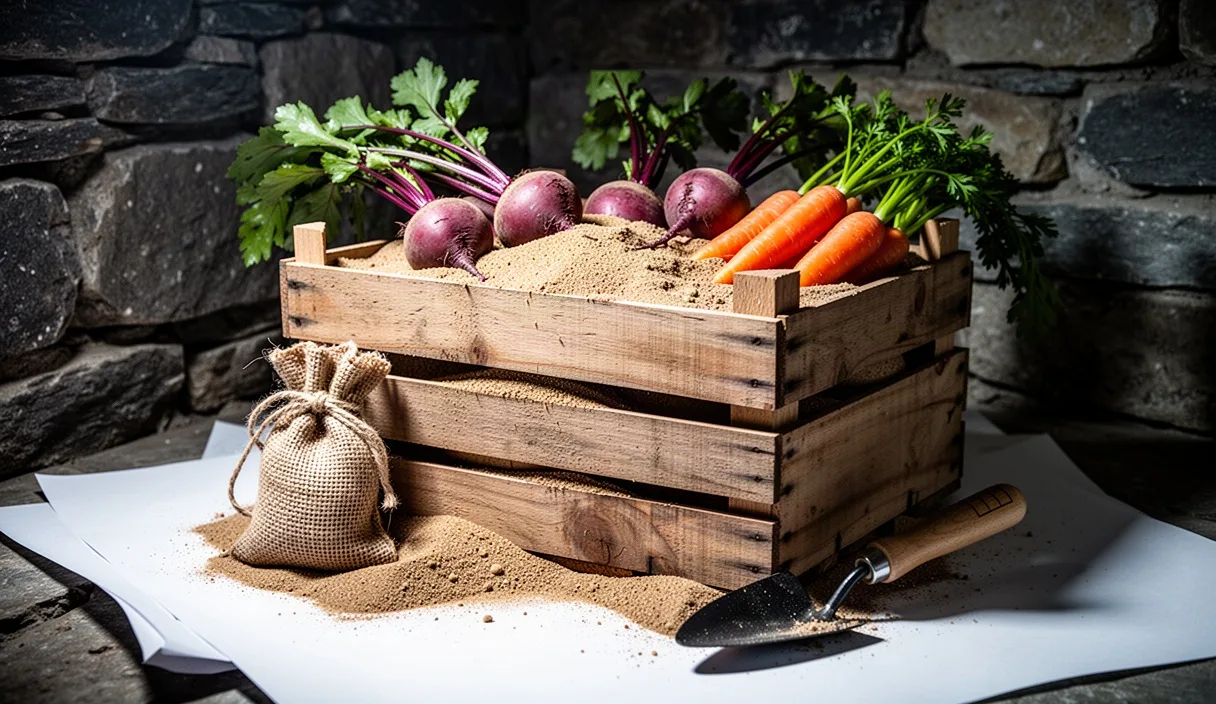
To recreate the stable, dark embrace of subterranean soil, we bed our prepared roots in crates filled with damp sand. Wooden crates constructed from rough-sawn pine, spruce, or cedar slats work best. Slats should have gaps of roughly 1/8 inch between them to allow oxygen to enter and prevent carbon dioxide from accumulating to toxic levels. Avoid aromatic woods like red cedar, which can impart strong resinous oils into the flesh of sweet roots.
The medium matters as much as the vessel. We use washed mason sand or horticultural sand, which has a sharp, coarse grain. Never use fine beach sand, which carries residual marine salt, or fine play sand, which packs down into an impenetrable, airless block when damp. The sand must be moistened to a specific state: take a handful and squeeze it hard. It should hold its shape as a firm ball without crumbling, but it must not squeeze out water droplets between your fingers. If water drips, the sand is too wet and will rot your crop.
To pack a crate, follow these structural layers:
- Laying the bed: Shovel a flat, two-inch layer of prepared damp sand across the bottom of the crate, pressing it lightly into the corners.
- Setting the first tier: Arrange the roots horizontally across the sand bed. Keep a margin of at least one inch between adjacent roots, and keep them one inch away from the wooden sides of the crate. Roots must never touch one another; physical isolation ensures that if one decays, the rot does not spread directly to its neighbor.
- Sifting the spacer: Pour damp sand over the roots, vibrating the crate gently with your hands so the sand flows into all the voids, completely covering the vegetables by a minimum depth of one inch.
- Adding successive tiers: Lay a second run of roots across the new sand floor, staggering them above the gaps of the tier below. Repeat this alternation until the crate is filled to within two inches of the rim.
- Capping the crate: Cover the final tier with a generous two-inch blanket of damp sand. This top crust absorbs any sudden shifts in ambient humidity and prevents the exposed roots from drying out under circulating cellar air.
Checking the bin weekly to cull soft specimens
Storage is not a forgotten cupboard; it is a weekly stewardship. A single decomposing turnip can ruin twenty pounds of sound produce if left unchecked. Every seven days, we walk the cold room with a notebook and a gentle touch.
Begin with the nose. A healthy root cellar smells of damp stone, forest floor, and clean starch. If you detect a sweet, cidery fermentation odor or the sharp, sulfurous tang of rotten brassicas, a vegetable has begun to fail. We do not empty the entire crate to find it. Instead, we carefully insert our fingers into the sand layers, feeling the shoulders of the roots where the stems meet the crown, which is almost always where rot starts.
A sound root feels hard as kiln-dried timber. If your thumb sinks into a shoulder, or if the flesh yields like wet foam, trace the vegetable through the sand and lift it out immediately. Scoop out the small pocket of sand directly surrounding the decayed root as well, since fungal mycelium easily threads through damp grains. Discard the spoiled root in an outdoor compost pile away from next year's garden plots. If the surface sand begins to feel dry and dusty during these weekly checks, mist the top crust lightly with a clean hand sprayer filled with cold water, taking care not to soak the deeper layers.
Reviving slightly tired roots in a bowl of well water
Even with rigorous attention to humidity, roots retrieved in February or March may display a slight loss of turgor pressure. They bend slightly rather than snapping when flexed. This happens because the root has slowly yielded tiny amounts of moisture through respiration over hundreds of hours. If there is no rot, discoloration, or sour smell, the root is entirely sound; it is merely thirsty.
We revive these vegetables by reversing the osmotic gradient before preparing them for the stove or cutting board. Fill a large ceramic bowl or stainless steel basin with fresh, cold well water or non-chlorinated tap water. If your water is treated with chlorine, let it stand in an open pitcher overnight so the chemical dissipates, as chlorine can bleach and taint the skin of raw roots.
Trim a paper-thin slice off the dry taproot end and the stem stub to open the vascular bundles. Submerge the whole roots completely in the cold water and set the bowl in a cold pantry or refrigerator for 12 to 18 hours. As they rest, the vegetable cells draw water back through their semi-permeable cell walls via osmosis, filling the internal vacuoles until the cellular pressure returns. When you pull the roots from the bath, they will have regained their original rigidity, crispness, and resistance to the knife.
Common mistakes
- Storing alongside apples or pears: Pome fruits release significant quantities of ethylene gas as they ripen. Storing apples in the same small space as root vegetables causes carrots to develop an intensely bitter compound called isocoumarin, while triggering sprouting in beets and potatoes.
- Using airtight plastic containers: Sealing whole root vegetables in solid plastic totes or tied poly bags traps the moisture they exhale. Condensation forms on the inner plastic walls, drips back down onto the roots, and suffocates them, creating an ideal breeding ground for anaerobic soft rots.
- Neglecting outdoor temperature spikes: Mid-winter warm fronts can push basement temperatures well into the fifties. Keep cellar vents open during cold nights and shut tight during warm winter afternoons to lock the cold air inside the building foundation.
- Storing damaged or cracked roots: Roots marked by shovel slices, deep insect borings, or split skins should never enter the sand bins. Set these aside in the kitchen for immediate use, canning, or dehydrating within the first week of harvest.
Practical next steps for the root keeper
To establish a resilient winter storage setup before cold weather arrives, begin by securing materials well ahead of harvest. Source three or four slatted wooden orchard crates from a local mill or farm stand, or build your own from unplaned, non-pressure-treated lumber, fastening the corners with stainless steel screws. Pick up coarse, washed builder's sand from a masonry supplier rather than bagged sand from a department store, and store it dry until harvest week.
Place an accurate minimum-maximum thermometer and a mechanical hygrometer in your chosen storage area now. Track the daily temperature swings for two weeks to identify how closely the room mirrors external weather shifts. Once your garden soil dips into the low forties and the first autumn frosts convert root starches into complex sugars, grease your shears, ready your sand, and lift your crop with the patience it takes to keep it alive until spring.