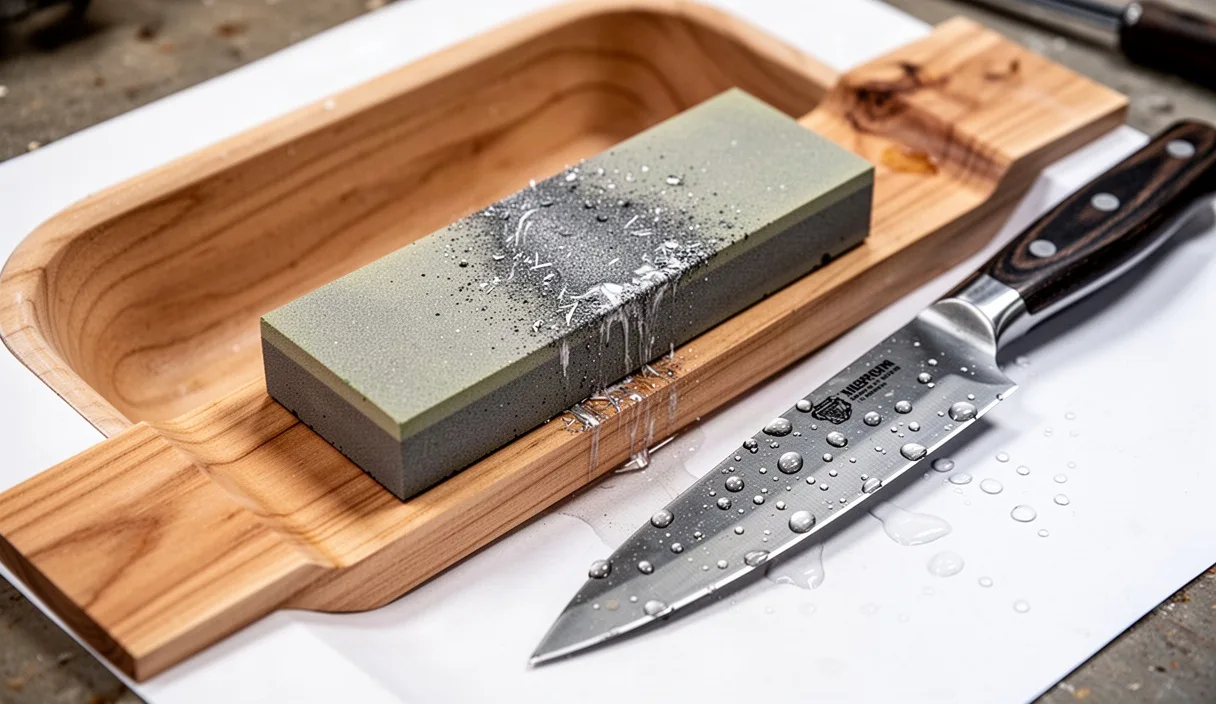
When a kitchen knife begins to slide over the skin of a ripe tomato rather than biting in, the temptation is to reach for a ceramic rod or a motorized pull-through gadget. We prefer to clear space on the counter, set down a damp towel, and prepare our waterstones. Working steel against water and abrasive grain teaches us how a tool is shaped, how metal yields, and how a keen apex actually functions under hand pressure. It is a methodical craft, quiet and grounded in touch.
A waterstone removes metal through controlled friction. As we draw the hardened edge across the wet block, microscopic silicon carbide or aluminum oxide grains shear away dull steel, forming two intersecting planes. When those planes meet cleanly along the entire length of the blade, the knife is sharp. Achieving this result does not require rare talent, but it does demand an understanding of grit, water absorption, hand posture, and the tactile feedback of the steel itself.
Selecting grit ratings for everyday kitchen edges
Synthetic waterstones follow the Japanese Industrial Standard (JIS) grit scale. Choosing the right stones depends on whether we are repairing a neglected knife or touching up an edge that has simply lost its crispness. Kitchen cutlery needs a balance of keenness and tooth. An edge polished to an extreme mirror will glide smoothly through raw tuna, but it will often struggle on tough bell pepper skins or roast poultry because it lacks the microscopic serrations that grab fibrous tissue.
For most home kitchens, three stones handle every task. A coarse stone restores edge geometry and removes small chips. A medium stone forms the actual working edge, cleanly defining the bevels. A fine stone refines those scratch patterns, leaving an edge that bites decisively while cutting cleanly through delicate produce.
| Grit Rating | Primary Function | Surface Behavior | Typical Application |
|---|---|---|---|
| 240 to 400 | Bevel repair and profiling | Fast cutting, coarse slurry | Chipped heels, broken tips, blunt thrift-store finds |
| 800 to 1200 | Primary sharpening | Balanced drag, steady mud | Everyday chef knives, santokus, general dullness |
| 2000 to 4000 | Edge refinement | Silky tactile feel, fine swarf | Slicing knives, vegetable prep edges, push-cutting tools |
| 6000 to 8000 | Mirror polishing | Glassy glide, minimal tooth | Traditional single-bevel yanagiba, raw fish preparation |
If we could keep only one abrasive block, it would be a reliable 1000-grit stone. A kitchen knife taken to 1000 grit will effortlessly shave forearm hair and tackle butternut squash without hesitating. When we pair a 1000-grit stone with a 3000-grit finishing block, we obtain an edge that endures weeks of home cooking before needing the stone again.
Soaking versus splashing water on porous stones
Synthetic stones differ based on how their abrasive particles are bound. Traditional clay-bonded and vitrified stones are porous, riddled with internal air pockets that must be saturated with water before use. Magnesia-bonded and resinoid stones are denser, requiring only a splash of water across the surface to start working.
To identify what we have on the bench, we watch the water droplets. If water beads on top or forms a thin, stable film, we have a splash-and-go stone. If the water vanishes into the block within three seconds, the stone must be submerged. We place porous stones in a plastic tub of clean, room-temperature water for 12 to 18 minutes. We know the stone is fully primed when the stream of small bubbles rising from the face stops completely.
Never soak a splash-and-go stone for extended periods. Prolonged submersion degrades magnesia binders, causing the stone to soften, crumble, or develop structural fractures as it dries. Once our session is finished, we wipe all stones clean of dark metal swarf, set them on their narrow edges out of direct sunlight, and let them dry slowly at room temperature for two days before packing them into storage boxes.
Locking your wrists to hold a constant angle
The single most important physical skill in sharpening is holding the blade at a steady angle relative to the flat stone throughout the stroke. The angle itself matters less than our ability to maintain it consistently. If our hands wobble between 12 degrees and 25 degrees on the push stroke, we create a rounded, convex edge that wedges into food instead of parting it.
For double-bevel kitchen knives, we aim for approximately 15 degrees per side on Japanese cutlery made from hard steels like VG-10, Aogami, or SG2. For softer Western knives made from German alloy steels, 18 to 20 degrees per side provides greater resistance against rolling on hardwood boards. A simple gauge: two standard copper pennies stacked beneath the spine of a typical 45-millimeter-tall chef knife produce an angle of roughly 15 degrees.
- Set the foundation: Stand square to the counter with feet shoulder-width apart. Place the stone holder on a flat counter at roughly waist height so your forearms rest naturally parallel to the work surface.
- Lock the joint: Grip the handle with your dominant hand, resting your index finger along the spine for lateral stability. Freeze your dominant wrist completely. The cutting angle is maintained by your wrist position, while motion originates from your elbows and shoulders.
- Apply targeted pressure: Place the fingertips of your non-dominant hand directly behind the edge, on the primary bevel, within an inch of the section contacting the stone. Press down with roughly three pounds of force, similar to the weight of a heavy ceramic mug.
- Move along the stone: Glide the blade diagonally across the stone surface in smooth, overlapping sections: heel, belly, and tip. Release hand pressure almost entirely on the return stroke to avoid scouring the edge backwards.
Reading the burr with the tip of your thumb pad
We do not guess when to stop working a coarse stone; the steel tells us. When we grind the first side of the blade, metal is pushed away from the stone until the edge tapers past zero thickness. The surplus metal rolls over to the opposite side, forming a microscopic curl called a burr, or wire edge.
To detect this ridge, wipe the blade dry on a clean kitchen towel. Lightly rest the dry, sensitive pad of your thumb on the face of the blade, then slide the pad outward toward the edge, perpendicular to the spine. Never slide your finger along the length of the blade. If the bevel is fully ground, you will feel a distinct, scratchy catch along the entire edge, like running a finger over a dry autumn leaf or a rough sheet of paper.
We must confirm that the burr runs continuously from the heel, across the curved belly, right through to the point. If a two-inch section near the middle feels smooth, the edge there has not yet reached zero thickness. We return that specific section to the stone for another dozen passes. Only when the burr is uninterrupted do we flip the knife over and repeat the process on the second side with identical pressure and stroke counts.
Progressing from coarse grain to fine polishing
Sharpening is a process of trading deep scratches for progressively shallower ones. Once we produce a burr on both sides of our knife using our primary medium stone (such as an 800 or 1000-grit block), our goal shifts from stock removal to scratch refinement. If we do not erase the coarse scratch marks before polishing, the micro-teeth along the edge will snap under heavy chopping loads.
As we work, a murky liquid called slurry or mud develops on the stone. This slurry consists of suspended abrasive particles mixed with shaved metal particles, known as swarf. On medium stones, this slurry helps round off hard transitions and smooths the path of the blade. However, on finer finishing stones (3000 to 5000-grit), an excessively thick slurry will dull the crisp apex. We regularly rinse the stone face with fresh water, working on a clean, glistening surface.
On our highest-grit stone, we lighten our touch substantially. Where we used three pounds of finger pressure on the medium stone, we use less than one pound here, barely more than the dead weight of the knife itself. We perform alternating edge-leading strokes: three passes on the right side, three passes on the left, then two on the right, two on the left, concluding with five gentle, single passes per side. This systematic reduction breaks away the wire edge instead of pushing it back and forth.
Stropping the refined apex on clean saddle leather
Even after thorough work on a 4000-grit waterstone, microscopic traces of bent steel cling to the apex. We address this remnant foil edge using a leather strop. A proper strop consists of a strip of vegetable-tanned bovine leather, roughly three inches wide and ten inches long, bonded smooth-side-up to a flat block of dense hardwood like maple, ash, or beech.
While some woodworkers prefer leather loaded with aluminum oxide or chromium oxide compounds, we find bare, unoiled leather ideal for kitchen knives. The natural silica content of tanned cowhide provides just enough mild abrasive action to align the apex without washing out the crisp micro-serrations we worked so carefully to build on our medium stones.
- Lay the leather flat: Anchor the strop block firmly against the edge of your cutting bench so it cannot skid away during the stroke.
- Match the angle precisely: Lay the bevel flat against the leather. Do not increase the angle to make it faster; lifting the spine even two degrees higher than your sharpening angle will round over the delicate cutting edge against the yielding leather.
- Draw edge-trailing only: Move the knife spine-first, pulling the blade away from the edge. Never push the edge into the leather, or the blade will slice deep gouges into the hide.
- Count light passes: Draw the knife six times per side from heel to tip with gentle, sweeping motions. Check the sharpness on scrap printer paper. The knife should slip through the paper quietly without catching or tearing.
Common mistakes on the stones
The most frequent error we encounter is lifting the knife handle too high when working the curved belly of the blade. When the handle is raised aggressively, the knife point gouges into the stone, scratching the face of the block and blunting the tip of the blade. Instead, follow the belly curve by gently rolling the wrist slightly inward while keeping the angle constant.
Another error is failing to flatten the waterstones themselves. As we sharpen, our strokes wear down the center of the block faster than the ends, creating a hollow swayback. Sharpening on a dished stone makes it physically impossible to grind a straight bevel. We keep an inexpensive diamond lapping plate on hand, drawing a pencil grid across our waterstone and rubbing the diamond plate over it under running water until the pencil lines disappear.
Lastly, many cooks rush off their coarsest stone before establishing a true apex. If you do not raise a burr on your initial stone, moving to a 4000-grit block simply polishes a dull edge. No amount of work on a fine stone can fix geometry that was left incomplete on the coarse abrasive.
Next steps in maintaining edge geometry
A properly sharpened edge should last between four and eight weeks in an active home kitchen, provided you use end-grain wood or soft rubber cutting boards and keep your blades out of the dishwasher. Between full stone sessions, five passes on your dry saddle leather strop every Sunday evening will keep the apex aligned and cutting cleanly.
Over months and years of regular sharpening, every knife slowly thickens directly behind the cutting edge as steel is worn away toward the wider spine. When a knife feels sharp on paper but wedges firmly when trying to split a raw carrot, the primary bevel has grown too thick. At that point, the knife requires thinning along the sides of the blade, a task best performed on a flat 400-grit stone or entrusted to a seasoned professional sharpener equipped with water-cooled grinding equipment.