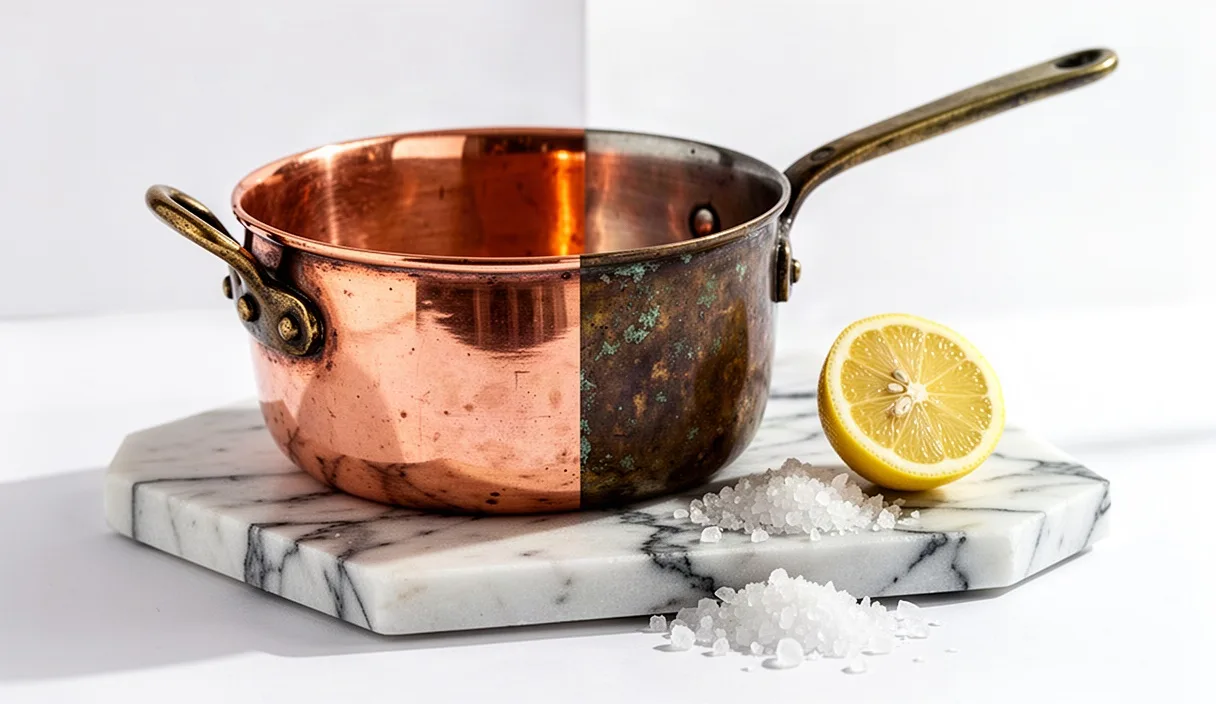
When an old copper rondeau or Windsor pan sits unused on a shelf, its bright salmon luster slowly surrenders to the air. In our workshop, we often take in heavy French pieces, built from thick two-to-three-millimeter stock, that have turned a dark, oily umber after decades near stove heat and grease. That dark skin is not permanent damage. It is a surface layer of copper oxides and polymerized cooking fat, clinging to the hammer marks or lathe lines of the metal.
Restoring this metal does not require harsh chemical pastes or electric buffing wheels that can thin out the hand-hammered planishing marks. A simple mixture of sodium chloride and acetic acid, mixed from pantry salt and raw vinegar, dissolves these surface oxides through a straightforward chemical reduction. When we understand how copper reacts with the kitchen environment and handle the cleaning paste with patient, manual strokes, we can return the pot to its original warm glow while keeping its historic shape intact.
How atmospheric moisture and grease create copper dullness
Copper is an active, receptive metal that responds directly to its surroundings. When clean copper meets ambient air, oxygen binds to the surface to create copper(I) oxide, also known as cuprous oxide. This initial layer gives the metal a deep, warm penny tone. As exposure continues, especially in the presence of ambient humidity, the metal forms copper(II) oxide, or cupric oxide, which shows up as a dull, stubborn brown or near-black film. If atmospheric sulfur or carbon dioxide enters the mix, the oxidation deepens into greenish carbonates, traditionally called verdigris.
In a working kitchen, this oxidation rarely happens in isolation. Every time we sear meat or reduce a stock over an open range, tiny droplets of aerosolized fat drift through the air. These lipids settle onto the cooler exterior walls of our copper cookware. The next time we light the burner, the rising heat bakes that micro-film of grease directly into the oxide layer. The result is a tough, mottled coat that resists simple hot-water washing.
| Surface Condition | Primary Chemical Composition | Visual Indicator | Tactile Quality |
|---|---|---|---|
| Freshly milled copper | Pure elemental copper (Cu) | Bright salmon pink, reflective | Silky, slick |
| Light atmospheric patina | Cuprous oxide (Cu2O) | Warm amber or deep penny red | Dry, smooth |
| Heavy kitchen tarnish | Cupric oxide mixed with grease | Dull dark brown, mottled gray | Slightly tacky or waxy |
| Corrosive oxidation | Basic copper carbonate | Chalky green or pale turquoise | Crusty, powdery |
Understanding this layered build-up explains why clear vinegar alone often drips off without clearing the metal. The oily binder keeps the acid from reaching the underlying oxides. By introducing dry salt crystals to the vinegar, we cut through the baked-on grease mechanically while creating a mild chemical reaction that loosens the oxide bonds simultaneously.
Mixing salt and raw vinegar into a working paste
When table salt dissolves in acetic acid, the chloride ions from the salt and the hydrogen ions from the acid create an active solution that strips copper oxides much faster than vinegar could on its own. For our bench work, we prefer raw, unfiltered apple cider vinegar or simple distilled white vinegar with an acidity rating of five percent. Raw cider vinegar carries a small amount of residual pulp and malic acid, which gives the mixture body and slows down evaporation as we work across large pan skirts.
The choice of salt requires careful thought. We avoid fine iodized table salt because it dissolves almost instantly in the vinegar, leaving no tooth to lift stubborn grease. We also avoid coarse rock salt, whose large, jagged crystals can gouge faint scratches into soft, annealed copper. A medium-grain kosher salt or pure sea salt, free from anti-caking agents like yellow prussiate of soda, gives the ideal balance of grit and dissolution.
- Measure 75 grams of medium-grain kosher salt into an earthenware or glazed ceramic bowl.
- Pour in 45 milliliters of raw vinegar, stirring with a wooden paddle.
- Allow the mixture to stand for two minutes until the salt begins to hydrate into a slushy slurry.
- Add 15 grams of unbleached wheat flour if you are treating steep vertical walls; the starch binds the liquid into a clinging paste that prevents rapid run-off.
Mix only what you intend to use in a single work session. Once salt and vinegar sit together in an open container, the free chlorine ions begin to gas off slowly, diminishing the chemical bite of the paste. A fresh, cool batch mixed right beside your sink delivers the cleanest and most predictable bite against the oxide layer.
Applying the mixture along the grain with a coarse cloth
Before applying the paste, examine the skin of your pan under direct raking light. Hand-hammered pans feature subtle, overlapping facets left by the planishing hammer, while spun copper displays fine concentric lathe rings traveling around the perimeter. We always move our cleaning tools parallel to these manufacturing marks. Rubbing perpendicular to the grain pushes abrasive particles across the microscopic ridges of the metal, creating cloudy micro-scratches that deaden the eventual shine.
For application, select a dense, textured rag. An unbleached linen towel, a scrap of clean hemp sacking, or a thick cotton huckaback cloth works far better than a synthetic sponge. Synthetic foam absorbs the acidic fluid while letting the salt crystals drop to the bottom, starving the contact area of the necessary grit. Fold the rag into a firm, palm-sized pad, dip it into the paste, and pick up a generous pinch of the wet salt grains.
- Set the pan firmly on its base on a damp towel to keep it from slipping on your workbench or sink edge.
- Press the salt-laden cloth against the darkest section of the sidewall with firm, moderate hand pressure.
- Work in short, steady strokes following the perimeter of the pot, tracking the path of the hammer marks or lathe lines.
- Watch the metal closely; within twenty seconds, the dark brown skin will dissolve, revealing bright pink copper beneath the slurry.
- Replenish the cloth with fresh paste as soon as the salt grains under your fingers dissolve fully into liquid.
Pay close attention to the areas around the cast iron or bronze handle sockets. Heavy soot and grease collect in the crevices between the rivets and the body. To clean these junctions without abrading the softer rivet heads, work the paste into the tight gaps using a stiff, natural-bristle horsehair brush or a trimmed hog-bristle stencil brush, rotating the bristles gently around the base of each rivet.
Immediate neutralisation with clear water and soap
The speed with which salt and vinegar strip tarnish comes with an immediate risk: left on the metal, the residual acid and salt ions will corrode the freshly exposed, highly reactive copper. Within two or three minutes of air contact, unneutralized acid causes flash oxidation, turning the salmon-pink surface into a cloudy, streaked orange mess. Worse, lingering chlorides trapped in the micro-pores of the copper can cause pitting corrosion down the road.
Neutralization must happen quickly and thoroughly. The moment an area clears of tarnish, flood the piece with warm, running tap water. Keep a bar of traditional olive-oil soap or an alkaline washing soda block at your cleaning station. Lather a soft cotton cloth with the soap and wash every square inch of the exterior, making sure the basic soap washes away any traces of acid trapped under the rim or behind the handle brackets.
Once the pan is rinsed clear, do not let it air dry in a dish rack. Water spots contain mineral deposits like calcium and magnesium that bond instantly to the bare metal, leaving ringed stains that require rubbing all over again. Take two clean, dry terry-cloth towels. Use the first towel to drink up the bulk water immediately, then use the second warm, dry towel to buff the metal firmly until the surface is completely bone-dry and warm to the touch.
Checking the integrity of the hand-wiped tin interior
While the exterior copper demands visual clarity, the interior lining demands food safety. Most traditional copper cookware is lined with pure block tin to separate acidic foods from the reactive copper substrate. When restoring the outside of the pot, take immense care never to rub your salt-and-vinegar paste on this silver-gray tin lining. Tin is an exceptionally soft metal, scoring easily under abrasive salt, and the acid will pit and dull its protective skin.
Once the exterior work is done, hold the pan under good, diffused daylight to evaluate the lining. Traditional hand-wiped tin has an uneven, striated texture with noticeable wipe marks left by the coppersmith's flax tow. Over years of wooden-spoon stirring, this tin wears thin. If you see dark gray or matte charcoal areas, that is normal tin oxidation. However, if you spot raw, pinkish-gold copper showing through the bottom or along the lower sidewalls, the lining has worn through.
- Total exposed copper smaller than a small postage stamp: safe for gentle cooking of neutral stocks, boiling water, or baking bread.
- Exposed copper larger than the size of an ordinary coin: time to retire the pot from acidic cooking, such as tomato sauces or wine braises, until it is relined.
- Flaking, blistering, or peeling metal: stop cooking immediately; this indicates the pan was overheated beyond the melting point of tin (232 degrees Celsius) or was poorly bonded.
If the interior lining shows broad patches of bare copper, do not attempt to patch it with soft solder or consumer plating kits. Food-safe cookware demands pure, ninety-nine percent minimum pure block tin applied over chemically fluxed copper at heat. This process, known as traditional hand-wiping, should be entrusted to a professional coppersmith who can strip the old interior and lay down a fresh, durable barrier.
Routine dry wipe-downs after cooking over open gas
Once a pan is back to its clean state, heavy chemical cleanings should be rare occurrences. Cooking over open natural gas burners introduces copper to moisture, heat, and trace sulfur compounds found in commercial gas supplies. These combustion byproducts settle on the bottom and lower skirt of the vessel during every cook. If left alone, they fuse with cooking spatters into a stubborn crust.
We keep our cookware clean through a simple post-cooking habit. Never plunge a hot copper vessel into cold wash water; the sudden thermal shock can warp a heavy base and break the metallurgical bond between the copper body and the inner tin lining. Let the vessel cool naturally on the range top until it can be handled safely with bare hands.
Once cool, wash the tin interior with hot water and a mild sponge, keeping the copper exterior as dry as possible. After the pot is dried, take a clean, dry piece of heavy flannel or chamois leather and rub the exterior vigorously for sixty seconds. The warmth remaining in the metal, combined with the friction of the dense dry cloth, lifts off soot, combustion moisture, and light grease before they have time to cure into baked tarnish. This brief dry rubbing preserves a glowing, honest work patina without stripping the metal down to raw pink every week.
Common mistakes
Restoring metal requires a light, disciplined touch. Over our years at the bench, we have seen beautiful nineteenth-century cookware damaged by well-intentioned short cuts. Avoiding these four frequent mistakes will save the longevity of your tools:
- Using synthetic abrasive pads: Green and red nylon scouring pads contain aluminum oxide or silicon carbide grains that cut deeper than copper itself, leaving permanent matte scratches that ruin the smooth skin of the vessel.
- Soaking the entire pot in an acid bath: Submerging a whole pan in a tub of vinegar loosens the handle rivets, attacks the interior tin lining, and leaves the copper surface pitted and raw. Acid should always be applied locally as a paste and washed off promptly.
- Neglecting the handle seams: Leaving acidic paste dried behind the handle mount allows chlorides to eat silently into iron rivets, leading to rust, loose handles, and structural failure over time.
- Using coarse sea salt dry: Rubbing dry crystals directly against the metal without adequate liquid lubrication gouges visible trenches into the exterior. The salt must always be part of a wet slurry.
Practical next steps
To begin caring for your copper, assemble a simple kit in a dedicated wooden box or bin beneath your sink. Keep an airtight jar of medium-grain kosher salt, a bottle of five-percent vinegar, a small tin of unbleached flour, and three or four clean linen rags reserved exclusively for this work. Having the supplies organized prevents reaching for harsh kitchen cleansers or abrasive powders during a busy evening.
Hang your restored copper from an open wall rack or ceiling beam rather than stacking it inside dark, enclosed base cabinets. Cupboards beneath kitchen counters often harbor elevated humidity from plumbing and lack air circulation, accelerating oxide formation. On an open rack, dry air circulates around the pieces, keeping the metal dry and showing the honest results of your work on the stove.